 T • C |
ATTENTION : CLEANING REQUIRED !
This Article may not meet BPWikia's Standards and may contain Outdated or Incorrect Information. |
T • C |
ATTENTION : ADDITIONAL WORK REQUIRED !
This Article may not meet BPWikia's Standards and may contain Incomplete or Missing Information. |
THIS PAGE IS OUTDATED BUT KEPT FOR HISTORICAL PURPOSES!
It's not meant to be updated, but left to see what the game was like in the past. Do feel free to start a new page for the current environment.
General
- Ask questions! If you don't understand something or need help of any kind just ask. There is a good chance that someone will help you.
- Ask in chat for sector borders and for any rules of the sector that you have joined. Some sectors may have rules they follow to make the game more enjoyable for everyone. This can help you avoid breaking sector rules & causing unnecessary problems for yourself or others in your sector.
- Why can't I send merc fleets and resource crates? This is because the game allows a player to receive only one merc fleet AND one resource crate per-day. This means that if the player your looking for is not in your friends list to send a merc fleet or resource crate to, it is because they have already received one that day. That is the reason they are not showing up in the list. This is confirmed here.
- Comms
- A Fast way to list base coords. Type /base in the chat line and press enter. This is a fast way for a player under base attack to quickly list their base coords for other players to see so that they might receive help.
- You can type some coordinates in the comms window (exactly as they appear in the game Ex: 53456,123) and then click on them as a kind of temporary bookmark.
- Also if you want the closest base in your 5x5 level hit range, type /tigerBlood into comms exactly as it says here and it will give you a target.
- Read A Complete Guide to Battle Pirates in the Kixeye forum.
Ships and Fleets
- Note that the fleet in the first slot moves slower than the rest due to a programming error in the game. That means if you are to repair something, the leftmost slot is to be preferred. - THIS HAS BEEN CLEARED UP AND IS NO LONGER THE CASE
- To repair your ships faster in the early stages of the game break up your fleet into segments and repair them so that the fleets repair time is less than 5 mins.
- To do this, remove damaged ships from a fleet until the repair time says less that 5 mins then repair those ships.
- After you get those ships in the fleet repaired add more damaged ones keeping the time below 5 min so your can use the speed-up feature and complete repairs fast until the fleet is fully repaired.
- Making ships that have 300 ship health allows you to speed-up repair on them because it needs 5 minutes to repair. If you have a repair officer your ships can have a maximum of 325 health & still have instant repairs.
- The game repairs at a speed of 1 ship health per second. So, 5 min max time for speed-up feature makes 60 ship health per min equals 5 X 60 = 300 ship health.
- With the use of the tip above you can repair a fleet of ships, were each ship has less than 300 ship health, that should take close to 25 min in less that 1 min.
- Subs repair at 1 ship health per 4 seconds.
- Example 1. Marauder with Titanium I armour 295 armour which is a 4min 55sec repair time.
- Place ships of less than 300 ship health as the front ships in fleets that are attacking Draconian fleets so they can soak up the damage and have heavier ships following them up to deal the killing blow. This will allow you to keep fleets repaired up and in fighting shape when dealing with most NPC fleets.
- There is an offline Ship Builder utility available in which different hull configurations can be tested offline. It gives build times, damage, repair time, etc. However, please note that as of the time this was written, the Offline Ship Builder does not incorporate some of the newer specials, or any draconian technology.
- Timing out battles - If your fleet gets into a battle by mistake with another players fleet both players are able to get out of the battle without taking any damage by each turning their fleets away from each other and staying out of weapon range. Then the players just have to wait 5 mins for the battle to time out.
- Flipping between ships in ship battles - While in fleet combat you can hit the left and right arrow keys to jump or flip between the ships in your fleet.
- If your fleet attacks a base, it can hold up to 500% of it's regular max cargo. That is provided that the base has so much resources.
- If your fleet is mining and is in danger of being attacked by a Draconian fleet, you can release the resource. Then your fleet won't be attacked. Afterwards you can easily reclaim the resource and continue mining.
- A white skull on a resource or salvage fleet means you control a mine or cargo ship, a red skull means it is controlled by another player, and a red dragon on the flag mean's it is computer controlled. You can very easy take over a salvage fleet or resource that is unoccupied and controlled by another player. Careful though, the other player might not like it.
- You can hide a fleet under a drac base for an ambush. You can't be hit that way. Place a bookmark on the Draconian base. After you have set the bookmark... drive the fleet over the drac base, then while it is over the drac base... click the move here button from the bookmark and your fleet will stop under the drac base.
- The hulls in your fleet don't appear in the same order in combat as in the dock. In combat the first ship (your flagship) is in the middle. From the rear your ships appear in the order 2, 3 1, 4, 5.

| 1 | 2 | 3 | 4 | 5 |
| 2 | 3 | 1 | 4 | 5 |
Base Design
A base is never indestructable, but you should try and make it as hard as possible to hit so that potential attackers will go after easier targets.
All bases should:
- Have good tower coverage where most of the defense platforms can protect each other.
- Upgrade turrets and the defence platform to max level.
- Upgrade walls to max levels and place them beside turrets.
- Combine turrets of different weapon damage and range.
- Place some flaks and anti-mortars to reduce damages.
- Turrets spread out enough to avoid splash damage.
- Be impossible to get to the warehouses, outpost and any other important building without having to get past all the defences first.
- Build a moat using 1 land fill about 2 waterfill around the outpost and warehouses.
- Special note: If you are level 20 and above, you will probably start to meet levis and FFs, SWBs and PMs, so you will need a bigger, 4 water and 1 landfill, gap.
- Missile sniping is not hurtful but you still need to repair.
- Place outpost and warehouse and 4 upgraded buildings in the small island 4 by 4 landfills area.
- Place all defences at 1 or 2 places so that they work together to form a kill zones at turning points.
- Add more than 1 narrow turns to slow down bigger ships like FF and Levis. By narrow turn i mean a u turn like this
- xxxxx ---------- ---------- xxxxx xxxxx xxxxxx
- xxxxx ---------- ---------- xxxxx xxxxx xxxxxx
- xxxxx ---------- ---------- ---------- ---------- xxxxx
- xxxxx ---------- ---------- ---------- ---------- xxxxx
- xxxxx xxxxx xxxxx ---------- ---------- xxxxxx
- xxxxx xxxxx xxxxx ---------- ---------- xxxxxx
- xxxxx ---------- ---------- ---------- ---------- xxxxx
- xxxxx ---------- ---------- ---------- ---------- xxxxx
- xxxxx ---------- ---------- xxxxx xxxxx xxxxxx
- xxxxx ---------- ---------- xxxxx xxxxx xxxxxx
- Build a moat using 1 land fill about 2 waterfill around the outpost and warehouses.
xxxxxx = Land
xxxxxx = Tile
---------- = Water
---------- = Tile
- Place howitzers at the front & covering turns, missiles (at least one or two next to howitzers to prevent sniping) and mortars (with a howitzer or sentinal missile to prevent deadzone attacking) at the back.
- Protect turrents from being sniped by missiles with long range attack specials like solid fuel booster and siege mortars.
- Use the Resource gatherers and 2-3 buildings as bait to quickly reach 25% base damage, so that second attack cannot start immediately. *NOTE* The higher your turret levels & other buildings not being attacked, the buildings that can be attacked, need to also be a higher level to compensate.
- Fortify and upgrade the RGs and fortify warehouses and OPs.
So far the best base layout that included all these is the spiral but with the latest changes in weapon range changes and that islands are now allowed, there are many other types of bases slowly appearing.
Why protect Outpost and warehouses?
- Outpost give 20% of total resources, while each warehouse lose 10% resources, and RGs lose any resources that they have gathered.
- Outpost is also one of the hardest to repair (Hardest being Launchpad), OP4 about 2.5 hrs. Warehouses level 7 takes about 30 minutes.
- All upgrades stop until you repair the building back to full health.
- When the Dock is damaged, it cannot send fleets out or repair fleets needing repair. Level 6 Dock takes about 15 minutes to repair.
Ship weapon range and Landfill/seafills
- At level 1-20, players normally need about 2-3 seafills moat to protect against smaller hull up to battle barge. DM and missiles have only about 70++ range.
- At level 21 onwards, you will get PM's with a range of 84 and missiles with SFB 2 (range 85) or SFB3 (range 93.6), you will need OP5 and a 4 seafills moat.
Range of weapons is about it radius, not diameter. And mortar must be able to target the middle of the building before shooting, therefore do not put walls in the inner island as mortars can target walls and splash damage your OP. (I'd like to see this verified as the last few base attacks I've made, I've been unable to target walls just the buildings/turrets) (Also, needing to be checked is if the target has to be in range of the middle of the building or the edge. The information on the kixeye forums states that the change is it now has to reach the edge of a building, not the middle of it)
Threats to base
- Cannons Fleet: Built level 3 and above walls. High level players with Hardened Barrels and Auto loading require level 4 walls to last the attack.
- Missiles Fleet: Built level 3 and above walls, if they are high level players, they may have Solid Fuel Boosters which requires a 3 water space moat. Then place some flak turrets.
- Mortars Fleet: Design base with moats 2-3 water tiles away and put some Bombard rockets to protect your defense turret.
- Hailstorm Fleet: Fleet of ships with antimortars are not rare, the common counter is 7 VM3 and above.
- Reactive/Ablative/Layered/Compound armor special fleet: ships with either Reactive/Ablative/Layered Special Reactive/Ablative/Layered/Compound armor special. These ships are not hurt so much by missiles or mortars or ballistics or all weapons. Use a mixture of base defense turrets to counter these kinds of ships and use the moat and turns to your advantage.
- Focus your fire on enemy fleet: Design focus fire areas where all ships entering must pass and add VMs ASAP for the splash damage.
- Blitz fleet who try to slip through Sentry & Howie defenses using speed. A good counter is to upgrade to howitzers 3 or 4, together with VM and sentinels that cover a wide area to work together to form a kill zone.
- Rockets from Launch Pad have different impacts: Do not cluster defense turrets together, try to spread out a bit using walls whether single layered or double layered (walls are now known too NOT protect against splash damage).
- Daisy Cutter: small damages to large area
- Widow Maker: medium damages to large area
- Bunker Blaster: huge damage to a structure
- Orion: huge damgae in big area
- Pinch: disables all structures in an area for a short period of time.
- Repeated attackers: if the first attack is less than 25% of base health, the attacker may attack a 2nd or 3rd time. Some attackers have been known to prep the base before the main attack by sniping off lonely defenses and clearing the passageway. Then a main attack on the base defence happens. Some even recon the base first.
- Sometimes when you are attacked and you have not lost anything at all, be careful as it may be a recon and the next few hours, the attacker may/may not attack you depending on his judgement.
- If your base is attacked and the attacker sort of destroys some targets around your base, then you may be being prepped. Prepare for the big one.
- Multiple attackers: These are the work of alliances and friends who attack a base for some reason at the same time.
- Farmers: These are players who repeatedly attack the same base(s) regularly. They attack due mainly to ease of huge gain and low repair cost.
- Bubbled Attackers: Players who attack and hide under a bubble. They have weak confidence of their base, just attack them at your leisure.
Base Planning
Abreviations
- OP: Outpost
- WHS: Warehouse
- RG: Resource Gatherer
- DP: Damage Protection
- BBL: Bubble (used in place of DP)
The best layout for Outpost 3, 4, & 5 are different due to the amount of land tiles & amount of buildings available per OP level. A player can however take future outpost layouts in consideration when designing their current base layout, which can make the redesign easier in the future.
Building Repair Times
Repair times for buildings varies depending on the building & building level. The higher the level of the building the longer it will take for it to be fully repaired. This also applies to defensive platforms as well. In some cases certain buildings like the Great Hall can be repaired instantly.
Damage Protection
Damage Protection: Is NOT determined by the amount of buildings destroyed vs the total amount of buildings you have. Instead it IS determined by the health of the buildings destroyed to your overall base health. This makes it extremely difficult to determine what needs to be destroyed in during a prep wave attack to give you a bubble since we can't see what a buildings health number is. With this in mind you want to place your RG's with the highest level near the beginning of where an attacker needs to go to get to your WH & OP. This way you'll have a better chance of getting a DP bubble. Maximizing your RG's to your OP's level & placing non essintial large buildings near the front will also help contribute in you getting a 25% DP bubble during a prep wave attack. NOTE: Try to avoid being attacked in the first place by trying to act friendly to the players in your sector. If there is someone one attacks you consecutively, put your best defenses to the direction their base is to yours to improve your chances of a succesful defend.
Sacrificial Buildings
Always Sacrificial: Oil Rig, Metal Foundry, Wind Turbine, Zynthium Refinery, War Academy, Shipyard, Intelligence Lab, Great Hall, Radio Tower, Trading Post. Pretty much anything else that is a low level.
Sacrificed During Special Circumstances: These buildings should only be sacrificed when they are not researching or not being used: Weapons Lab, Advanced Lab, & Naval Lab. If you have an area with your OP & WH's that was being used to protect labs while upgrading, you can move the Launch Pad there once your labs are all level 10 to protect your rockets. If the launch pad is destroyed, it takes a long time to repair and longer if it is holding a rocket; however, any rockets that may have been ready to use will not be destroyed.
Buildings to Protect
- Protect OP & WH: You want to protect your OP & WH's as much as possible. You lose 20% of your resources when your OP is destroyed, and 10% for EACH warehouse lost.
- Sacrifice your RG: RG's are NOT important to defend. If they are destroyed, you only lose what is in them and they repair fast. Place these near the front of where an attacker has to go to get to your OP & WH, so if he fails in the first attempt you might get a bubble which will prevent a second attempt. Another reason to place them in the front is so that his ships fill up on the RG's resources so if they do destroy your OP & WH's you keep more of what you have.
- Protect your Dock: A destroyed dock must be repaired before you can launch fleets. Ex: A level 7 dock takes about 22 minutes to repair.
- Protect Upgrading Labs: If a building that is upgrading is destroyed you not only have to repair it before upgrading continues, but extra time of (?1-12hrs?) is added onto the time it takes to complete the upgrade (I know, it sucks). Research will still carry on even if the lab conducting the research is destroyed. There are not enough land tiles even with an OP5, to safely protect all of your labs at the same time. Common practice is to move the lab you want to upgrade to where your OP & WH are located then start upgrading it. Buildings that are upgrading can NOT be moved until upgrades are complete. [Not true - as long as you're not in full screen mode press shift and click on the upgrading building to move it where you want]
Defense
- Upgrade Defense Platforms & Walls: Research/upgrade your defensive platforms & walls to level 3 ASAP. Level 1 and 2 platforms will be destroyed fast. Lvl 3 will make the attacker decide if it is worth the repairs to attack you. Once you are level 20 or higher start focusing on getting level 4 defenses, since at level 22 players that are level 27 with Floating Fortress fleets & Du4 armor can get past level 3 defenses with minimal losses.
- Upgrade Defense Weapons: Level 1 and 2 defensive weapons do not hit hard enough to protect your base once you are past lvl 17. Researching level 3 defensive weapons & adding them to defensive platforms will help deter players from attacking. The higher you get past level 20, the more important it is to get level 4 defense platforms & weapons or you'll find getting those expensive upgrades like OP5 & Depeleted Uranium 4 nearly impossible to start.
- Upgade Walls: Walls help slow down ballistic attacks & when surrounding defensive platforms helps to protect them from splash damage. To help minimize damage from Orion Missiles you want at least 2 walls between your defensive platforms when possible. If you find that the person attacking you the most is using a ballistic fleet you can double up your walls on the side the attack is coming from. This makes it harder for the attacker to take out your defensive platforms since they would have to stop to take out the walls & platforms causing them to take lots of damage.
- Anti-Weapon Defense Weapons: Level 1 & 2 do not protect much against fleets made up entirely of the type they are protecting against, but they do help your platforms stay up longer. In the end game you'll find that if you only have 1 that it will have a bunker buster used against it or a pinch rocket used on it. Making your other turrets more vulnerable. If used closer to your OP it can help keep your OP safe if only one ship of that type makes it past your other defenses keeping it from even damaging the buildings it is protecting.
- Anti-Mortar Weapons on Attacking Ships: When bases with Victory Mortars face fleets with anti-mortar weapons on them, they become ineffective if every ship has one on them. The only way these fleets can be damaged even if they have 1 anti-mortar per ship is by having 6 Victory Mortars or putting a Slide Loader 3 special on them. Place Victory Mortars so they have the most damage coverage for your canal & can protect your OP if ships get past your other defenses & stop to focus attacks on it.
- Placing Defensive Platforms: Place all defenses in 1st or 2nd land tiles, unless deploying mortars since mortars have minimum and maximum attack range. Most fleets stop to attack howitzers at range, which is why its good to place Sentry Towers next to them to provide coverage. Howitzers have the most benefit if placed so they are protecting turns. There are a lot of good base ideas & platform placement ideas on the kixeye forums. Just remember that no setup is proof against everything, there are always ways to get around them. Its best to find one that works best for you & against most attack types.
Priorities
- Base defense MUST be a priority. Fleet/ship upgrades are secondary. A common thing to hear on this subject is that a player MUST be able to protect what he steal or what's the point of stealing it when someone else can steal it back?
Guarding Bases
- One can choose to use fleets in the map interface (screen) to "guard base" so that other players cannot go straight to one's base.
- This serves as the first line of defense against base hitters. It also serves as an early warning system to you if you're online when these fleets come under attack.
- However, be aware that if you place all of your fleets on guard, that you may have to suffer the fate of not being able to repair all of your fleets when your dock is hit. This can be especially true if you have low levels of one resource type before or after your base is hit.You have to repair your dock first before repairing your fleets.
- Note: Resources are required & used to repair bases after damaging attacks.
- If you guard with A then B, they will be attacked in the order A, then B. Assuming they are hidden behind the base - otherwise they can be attacked in whatever order the attacker desires.
Player Farms
Farming is the process where other players rob you of your riches regularly.
- Farms: These are player bases that are easy to attack, not very protected, & have very large profits with low repair costs. (Square bases typically become farms)
How to Stop/Prevent Farming
- OP Mortar or Solid Fuel Booster Protection: Change your base design ASAP, & create a moat around your Outpost and warehouses. Most attacker fleets are made up of Mortars, the new trend are fleets using Missiles with Solid Fuel Boosters (SFB). If your below level 15 2 tiles of water between your OP & WH's should be sufficient as most attackers won't be using SFB yet only Diplomat Mortars. Once you reach level 15+ & have a OP of level 3+ you'll need at least 3 tiles of water between your OP & WH's to protect them from Peacemaker Mortars. When you start seeing Fleets with SFB II & III you'll need 4 tiles of water to protect you.
- Fortifying: Do NOT Fortify your sacrificial buildings past level 2 these buildings when destroyed help you get your bubble. If the fleets can go past them & not destroy them, & are instead destroying your Defense Platforms then if they fail you might not get a bubble. That player can then send in a second attack fleet, to finish taking those buildings & getting past what ever defenses you have left to then focus on your OP & WH's. So, you want these buildings destroyed quickly within one or two hits, but at the same time they need to help slow down the attackers fleet to give your Defenses a chance to sink ships without taking damage. Oil Rigs are the exception as fleets need to destroy them to move further into your base. Fortify as high as you can your OP & Warehouses since these are the main targets of your attacker. Even if they make it to your OP & WH, if they can't destroy them before the timer is up they don't get the resources they hold.
- After Attacks While Under DP: Change the design of your base, & change where the entrance to the inside of your base is located. There are lots of good designs & design ideas on the kixeye forums. A lot of good designs can be found here & here.
- What to do While Under DP: Stay under your DP for the duration & do all of your upgrading/resource gathering during this time. Try to have it spent before your DP drops. Higher WH levels can also mask how much resources you actually have on hand, making it seem like you have very little resources. Another way to protect your resources is if you have a guard fleet & are online when it comes under attack start a large upgrade, research, or ship construction using as many of your resources as possible. After the attacker leaves possibly after a base hit. Once repairs are complete you can cancel the things you started to get back most of your resources & then start saving up again for what you really want.
- Hit the Attackers Fleets: After you get your DP bubble, locate the attackers base & any mining areas around it. If they have fleets guarding their base or out mining then send your fleets to attack. This should upset them in several ways.
- That you're actually attacking back & if you defeat his fleets you're causing him to have to repair them instead of being able to use them.
- You're causing him to have to spend resources to repair his fleets instead of on upgrades or researches.
- By getting him to spend resources & time in repairing fleets, you're making yourself an undesirable target. The thing most players look for are easy targets that get them decent amounts of resources for as little trouble as possible. When you start cutting into the profits they are getting from you then the more likely they are to leave you alone. Especially if they can't attack you b/c of the DP bubbles that they have been giving you. This can be a double edged sword as more then likely this person will want to hit you back for even thinking of attacking them in the first place. At least it shows them you won't just lay down without a fight, & that you will fight back.
- Give the attackers base to as many of your sectors base hitters as possible that way they are coming under attack as much as possible by others in your sector giving them another target to focus on instead of you. Just don't spam it in comms or you could upset your sector for spamming. Once or twice a day at different times is reasonable, & check to see if that player has a bubble or not first. If they do then it would be pointless to even post their coordinates.
- Attacker Hiding Under DP:
- That they have a poor base design & that they themselves are an easy target.
- They have lots of resources piled up & are afraid of losing them.
- That you will get a strong player from your sector to destroy their base.
- They've already been attacked by someone.
- Attacker Protecting their Base with Fleets: Basically just play cat & mouse with them. Hit his ships when you can, & if his base is open attack it. You can always skim his base hitting his Gatherers taking whatever they have to give. Though skimming isn't best done while the player is online or just after they attack you, as the gatherers will most likely already have been cleared out & you won't get much benefit from doing it. If they get a bubble then they might decide to stay under it, giving you even more free time without being attacked by that player.
Mining vs Salvages vs Base Hitting
- Mining: Should only be done when you need one particular resource type or your not going to be playing for awhile. You can use a cheap fleet to unlock a higher level mine, & if you release it then attack with your mining fleet it will gain the left over resources your cheap fleet couldn't take.
- Salvages: These should be your focus when your going to be online & active. Hit them with your cheap instant repair fleets. For more information you can check here & in our Draconian Salvage Tactics.
- Base Hitting: This should only be done if you have the fleets to hit bases & the defenses to prevent that player from taking back what you steal. At low levels this doesn't really benefit you as you'll level up faster, & become more of a target to higher level players. Focus on salvages instead for resources as you'll find them much closer & with practice easier to hit than bases.
Base Setup and Defense 101
Follow these tips and you will be able to create a formidable fortress and hold on to your resources.
- Protect your Outpost and Warehouses at all costs. If you lose these buildings you lose your resources.
- Use those resources up as soon as possible to reduce lost.
- Regularly bank resources to reduce lost. (it is a good practice to bank in resources every 7 hours.)
- Defensive weapons - Don't bother spreading them out to try to cover your entire base.
- An attacker doesn't care about your entire base, they just want your resources. Arrange your turrets so all your defensive fire is focused on one spot...the attacking fleet.
- Protect your weapons with walls, and built 2 layers of them.
- Place Defence weapons 1 to 2 spaces apart to put walls and to prevent splash damages.
- Use a mixed variety of weapons: Howitzers, Missiles and Mortars together with anti-mortar and anti-missiles flak turrents.
- Re-arrange your land tiles to force attacking fleets to take a specified route that requires tight turning. There are several designs that you can use in order to make your base more effective at protecting your resources.
- Canals need to be at least 4-squares wide to prevent peacemaker mortars from hitting.
- You only need to guard the Warehouses and Outpost.
- Anything else should be placed upfront to draw fire from the attacking fleet and give your guns more time to target it.
- Tools are available to help you improve your base design without the effort of actually doing it until you find a design that works for you like an unofficial Battle Pirates Base Designer tool.
- Canals need to be at least 4-squares wide to prevent peacemaker mortars from hitting.
- Help the attacker to trigger the Damage protection (also called "Bubble") and thereby avoid being attacked the second time immediately.
- Damage protection(DP) means that nobody can attack your base for a certain amount of time.
- Damage protection duration is determined by the amount of damage the attacker has done to the base.
- 25%-50% damage: 18 hours DP.
- >50% damages: 1 day 12 hours DP.
- Put Buildings near defence weapons to draw fire and increase chances of DP.
Friendly bubbles
If two (or more) players "attack" and then "retreat" without doing each others bases any damage, after a certain number of attacks, you get a bubble.
- After 5 times you get a 1 hour bubble;
- At 10 times you get a 2 day bubble.
note: this doesn't require you to do any damage to each other. but two things you need to know to do it right.
- Only one person attacks at a time, then, once he's out of the other guys base, the other guy attacks his base.. both retreating.
- Only if you BOTH attack at the same time one the 10th attack, then you BOTH get the 2 day bubble.
If more than two people want to bubble, pick one to hit each person, doing them one at a time, and just moving to the next after the 10th attack on them. then on the last person they bubble, they have that person hit them at the same time on the 10th hit so everyone has a 2 day bubble.
Also note this is why if attacking to kill a base and you enter and leave to many times it will bubble... you may not have been the first one there!
Alternatively, you can get your friends to hit your base enough to trigger damage protection.
However this tactic is very wimp-like. And will get you made fun of in your sector.
- 25-50% will get you an 18 hour bubble
- >= 50% and/or the destruction of the Outpost will get you a 1.5 day/1 day 12 hours bubble. A destroyed Outpost alone already gives you resources according to what that player has. outpost gives out more resources than warehouses.
High level base Design (18+)
Drag-n-Drop Base Build Simulator
Curtis Smale published some really good base designs on the Battle Pirates Forum.
Outpost 4
http://forums.kixeye.com/threads/59417-Mah-little-level-25-base-%28OP-4%29-%28version-5%29
Outpost 5
http://forums.kixeye.com/threads/122880-Mah-fun-little-base-(OP-5)-(version-6)
http://forums.kixeye.com/threads/123374-My-newest-OP-5-Design-Test.
http://forums.kixeye.com/threads/123739-Updated-op5
http://forums.kixeye.com/threads/132609-OP-5-Version-7-LVL-30
Draconian Salvage Fleet Tactics
This section is for tactics that players have developed to taken down Draconian salvage fleet fast and easy. When you defeat Draconian Salvage fleets or Draconian fleets guarding resource depots you receive resources and can find Draconian Blueprint parts. These blueprint parts are collected in the intelligence center and give you access to Draconian weapons when the blueprint is complete and the requirements are met.
One method that always works for salvage fleets levels 1-21 and resources 1-29, and sometimes higher: Four Submarines with Havok Torpedoes4, No armor, Engine Upgrade1 or higher, (if you have Shipyard2, use ...) and some small, fast and easy repairable ship. The key to this is to start with one sub to get used to the timing, and then move to the four-ship fleet. In the battle, turn your ships around, and time their movements so that they stay just ahead of the drac fleets. If you can target the drac ships with missiles, do it; after they're all sunk, you have a lot more leeway when controlling your fleet. Proven tactic, very simple and widely used. Masarykoi 18:03, December 20, 2011 (UTC)
If you don't like controlling your ships a good rule to keep in mind is: "Don't hit if it won't fit." Make sure your cargo is equal or greater than the salvage drop.
Note: The resource dropped is divided between the four resources with slightly more metal than oil, slightly more energy than metal and slightly more zynthium than energy.
As of 26/6-2012 the levels displayed on salvages and mines changed:
The formula for for converting old levels into new: Old = (New+3)/4
| Old | 1 | 2 | 3 | 4 | 5 | 6 | 7 | 8 | 9 | 10 |
|---|---|---|---|---|---|---|---|---|---|---|
| New | 1 | 5 | 9 | 13 | 17 | 21 | 25 | 29 | 33 | 37 |
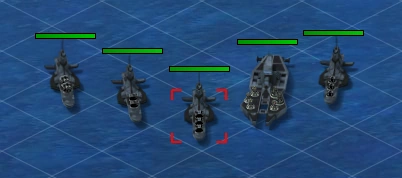
Level 1-9 (formerly level 1-3) Fleets


The Fleet Makeup:
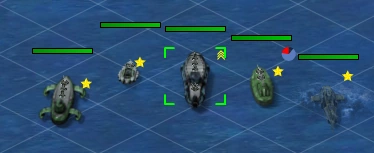
Lv1: 3 Drac Gunboats
Lv5: 3 Drac Skirmishers
Lv9: 1 Destroyer + 4 Drac Skirmishers
---
Strategies:
- Make a fleet with the lead ship (flagship) and/or ships (fleet slots 3 and 4) with below 300 HP, so it/they can be speed-up repaired.
- Marauder's and Longships are best used for this.
- Lower level players should use their best ships. but attack in fleets of 4 or 5 ships as draconian fleets have only 3 ships.
- Range and power is important here as draconian gunboats are probably using light cannons/missles, which would be non-blueprinted weapons similar to grade1 thuds/rapiers.
- These drop resources from 15,000 - 35,000 depending on the level
- Splash damage can easily take out half the attacking fleet due to their low armor
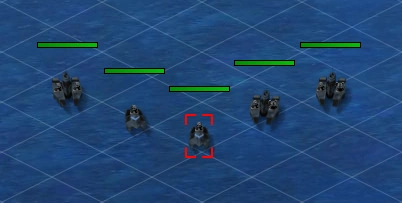
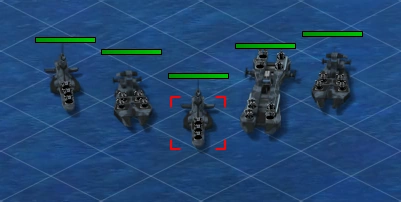
Level 13 Fleets

{C}Level 13 fleets consists of 3 destroyers sized and 2 drac skirmishers. (The official names of the skirmisher-like ships and gunboat-like ships have not been announced. All other drac ship names are taken from their names given as raid prizes.)
Use ships with heavy splash damage. Or a marauder fleet with instant repair.
Alternatively, use a fleet of five battle barges, each with four Thud IV, and at least HB1. This will auto-attack with zero damage.
Drops resources in the 100,000 - 200,000 range
.
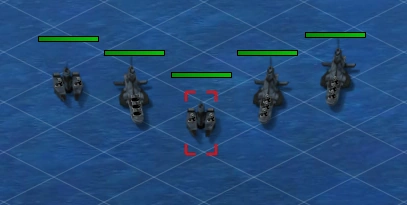
Level 17 Fleets

Consists of 3 Light Cruisers and 2 destroyers. Apparently one destroyer has impact cannons; the other, strike missles. One of the Light Cruisers has Firestorm/Assault rockets. Another has Assault Cannons & Shockwave Mortars, like LCs from higher-level fleets. The third has Strike/Assault Missiles. [This weapon description, or that of any other salvage level, can be corrected if someone knows better.] This is a good level of salvage for auto-attacking. Their fleets are relatively weak and have low damage against leviathan/seawolf tier ships, or espescially ships more powerful than that. Drops resources in the 300,000 - 400,000 range.
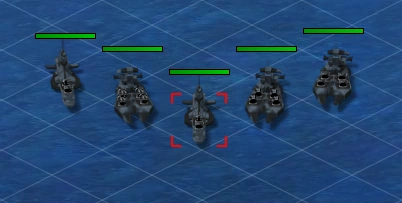
Level 21 Fleets

The old turn and run with mortars is very effective here. Just note that the 2 Light Cruisers, being faster than the Battleships, should be the trigger for your mortar firing. (Always have the red target icon locked onto the closest ship while kiting with mortars.) If you destroy the 2 mortar ships, then you will face the three Battlecruisers- which have Assault Rockets/Missiles.
You need engine1 and thruster2 so that you can turn faster at the edge of map.
Strategy: Have several ships with mortars, turn the ships to face away from the oncoming Draconian Ships, then when at the edge of your Mortar range start moving your ships towards the edge of the map. This way the Draconian Ships will move into your falling Mortars. When near the edge of the map turn one ship up or down & have the others stop. Most of the lead ships will follow the one turning, allowing your others to follow parallel & dealing damage destroying the remaining Draconian Ships.
Drops around 500,000 - 750,000 resources
Level 25 Fleets

This fleet is comprised of four light cruisers and one Battleship. Armed almost exclusively with mortars
Method 1: Direct assault with fast hulls with engines and strong armor. These Draconian fleets have weak short range defences, so if you succeed in getting close to them fast, they won't have time to hurt you bad and have no defense against your strong short range weapons. This also works on level 8 fleets.
No doubt direct assult is a good way, but the repair cost and time maybe a bit high as the Light Cruisers may have Assault Cannons.
Method 2: Kiting the 4 Light Cruisers first, then circling the battleship with a fast combat speed and long range weapons. (Mortars can't hit ships moving at a certain speed or above, because they take time in the air.)
Method 3: Use 3 or more predator subs to ambush the 4 Light Cruisers, then kite the battleshiip with the subs. Engine 1 is required to out run the Light Cruisers and their mortars.
Gives around 1,100,000 - 1,400,000 in resources.
Level 29 Fleets

Level 8 fleets are only for high levelers, (25+) but are extremly worthwhile to really stock up on resources. They appear beside players who are lvl 28 to 31 Level 8 fleets are notoriously difficult because they have a Dreadnaught with 8 siege mortars. The best way of dealing with these is using your own big ships, your FF`s (Floating Fortresses), a sea wolf and a SS (Stalker Submarine). send your 3 FFs turning around to head away from the draconians, while your SS and your sea wolfcircle around out of range. When the draconians reach your FFs, speed the sea wolf and SS into the back of them, and, with your SS armed with rippers and your sea wolf armed with max level HR (Hydra Rockets) and watch as the Draconian fleet is bombarded with 30 Rockets! Another tactic uses 2 seawolfs armed thuds with hardened barrels 3, no armour and engine upgrade 2 and 2 subs engine upgrade2 no armour.. Picks off the 2 Light Cruisers with the subs and then slaughter the battlecruiser and dreadnaught with the seawolfs, this can be done fast and very often without damage. No armour equals less repair time and costs. Tactic 3 is to use a seawolf fleet with cutlasses and/or assault missiles. Use SFB2 or 3 and lasers as specials. Come in from the SW and immediately turn. You will outrange all their weapons, so wait till the first ship is in range then move slowly away from them to keep firing continuously. You can also take this out without taking damage using a fleet of 4 subs (if predator use any level of engine). Take out the faster ships first (watchout for the short range ones as it will allow all the other fleets to fire there missiles and mortars at you). Then once they are sunk use a sort of hit and run tactic on the dreadnaught as it uses mortars that fire in a smaller ark than any of the others. gives around 2,000,000 resourses.
Level 33 Fleets
Level 33 (formerly level 9) fleets appear beside players who are lvl 32 to 35
These fleets consist solely of Battleships. Some appear to have engine upgrade since they don't travel at the same speed. The ships are armed with a mix of (siege missles or siege mortars) and (seige rockets or siege cannons).
One of the easiest ways is to use submarines. Park your submarines right before they submerge and move only when the close combat based ships come too close as they can scan out your position. If your subs have Ion Thrusters installed on them you can repeatedly do hit-and-run tactics on the long-range ships.
If your subs have level 2 or 3 engine upgrades, you can just continuously circle mortar based ships but make sure your ships are stacked or really close.
Or use a seawolf missile fleet, see tactic 3 above for level 8.
Level 33 Draconian Salvage fleet drops resources in the 4 million range with slightly more zynthium.
Level 37 Fleets
Level 37 (formerly level 10) fleets appear beside players who are lvl 36 or above.
Use seawolf fleet with missiles and SFB3, same as level 8, tactic 3
Level 37 Draconian Salvage fleet drops resources in the 8-9 million range.
NOTE: for the Draconian mines tactics are almost the same except the fleets are weaker (I.E, two levels lower than Draconian salvages) Yes this is true...... they also give off only the res you are hitting so dont expect to get all sorts of res from it.
You could use for every fleet a instant repair fleet